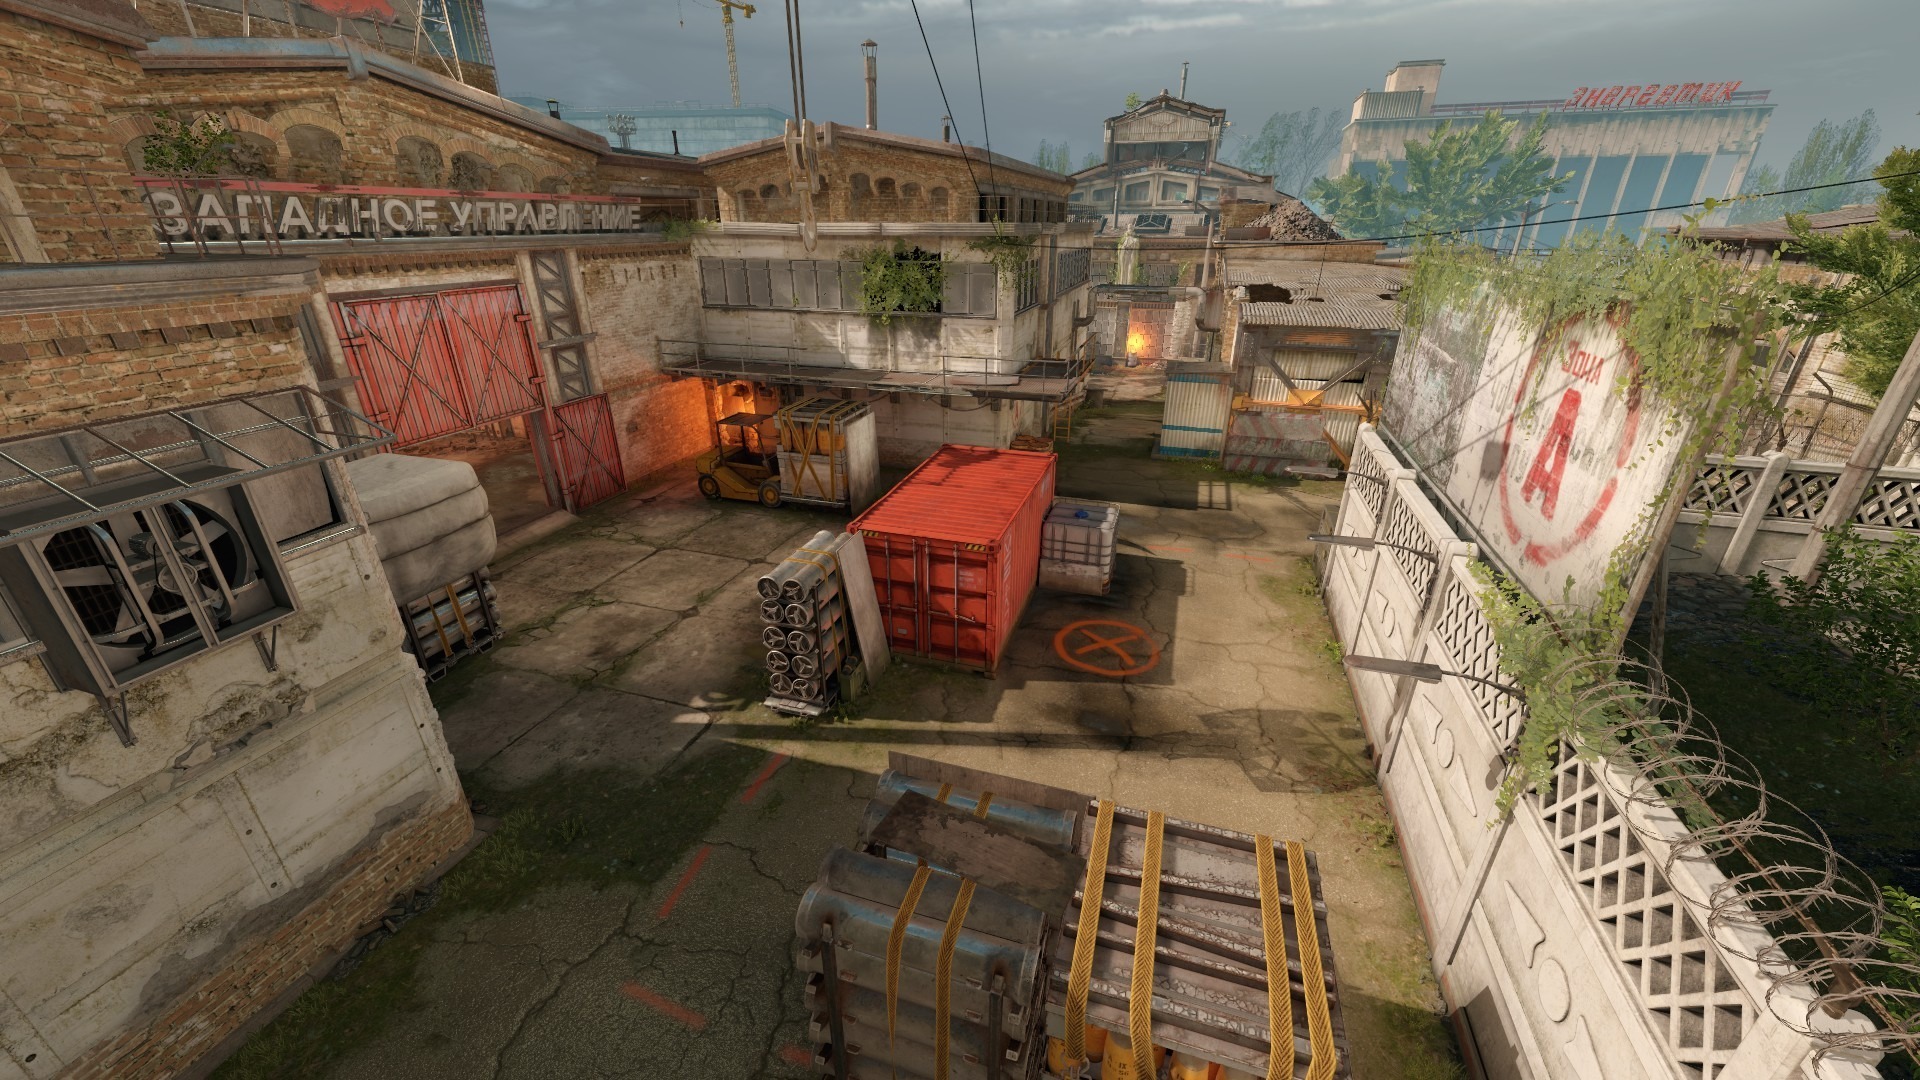
CS2 Cache Guide: Callouts, Smokes, Positions and Strategies
Cache is back where it belongs: at the center of competitive Counter-Strike.
Valve officially added the rebuilt map to Counter-Strike 2 in April 2026 before moving it into the Active Duty Map Pool with Premier Season Five in July. Cache replaced Overpass and was also adopted by major tournament organizers, making it essential knowledge for ranked grinders, aspiring competitors and professional teams.
Veteran players will immediately recognize the map’s iconic three-lane structure, explosive Mid battles and fast rotations. However, the CS2 version is not simply the old CS map with updated graphics. Valve has already adjusted geometry, clipping, visibility and other map details since release.
That means old strategies can still provide a foundation, but outdated grenade lineups and pixel-perfect setups should never be trusted without testing them on the current version.
This guide covers the essential Cache callouts, must-know smokes and molotovs, powerful positions and practical strategies for both T and CT sides.
Is Cache in CS2?
Yes. Cache is officially available in Counter-Strike 2 and is currently part of the Active Duty Map Pool.
Valve added Cache to CS2 on April 28, 2026. The map initially became available in modes such as Competitive, Casual, Deathmatch and Retakes.
On July 8, Cache entered the Active Duty rotation with the launch of Premier Season Five, replacing Overpass. Major tournament organizers also adopted the updated map pool, bringing Cache directly into top-level competitive play.
Its return is a major moment for Counter-Strike. Cache had been absent from the Active Duty pool since 2019, while the CS2 remake first appeared through the Steam Workshop before being officially integrated by Valve.
CS2 Cache Map Overview
Cache is a traditional three-lane bomb-defusal map built around three major areas:
The layout is easy to understand but difficult to master. Most areas are tightly connected, allowing both teams to rotate quickly and create constant pressure across the map.
Mid connects to A through Highway and to B through Vents and Checkers. The CT side can rotate between the bombsites through internal routes around CT Spawn and Connector.
This makes Mid one of the most important battlegrounds on Cache.
A Terrorist team that controls Mid can threaten:
An A split through Highway
A B split through Vents and Checkers
Pressure on Connector
Fast rotations between both bombsites
Late-round lurks behind the defense
For the CT side, losing Mid creates a serious problem. Defenders are forced to watch additional angles, rotations become more dangerous and both bombsites can be attacked from multiple directions.
Cache rewards coordinated teams that combine map control, clean trading and well-timed utility. Five-player rushes can still work as a surprise, but structured defaults and split executes are usually more reliable against organized opponents.
Cache Callouts in CS2
Callout names are not completely universal. Players from different regions may use alternative names, while some teams develop their own terminology.
The callouts below are among the most commonly recognized in English-speaking matchmaking and competitive play.
Before playing organized matches, make sure everyone on the team is using the same names.
A Site Callouts
A Main
A Main is the primary Terrorist entrance into A Site.
It leads directly toward several dangerous CT positions, including Forklift, Quad, NBK and the center of the bombsite. Attackers should rarely leave A Main without flashes, molotovs or support from another route.
Lockers
Lockers is the inner section of A Main closest to the bombsite.
This callout is useful when an opponent has already moved beyond the deeper A Main area but has not fully entered the site.
Squeaky
Squeaky is the small room and blue door leading into A Site.
Opening or breaking the door creates sound, which can reveal pressure before the execute begins. However, Squeaky is extremely valuable when synchronized with an A Main entry or Highway split.
Forklift
Forklift is located near the A Main entrance.
It is one of the most common defensive positions on A because it allows CTs to challenge attackers as they leave the choke point. It is also heavily pre-aimed and highly vulnerable to molotovs.
Quad
Quad is the area behind the stack of boxes at the back of A Site.
It provides strong cover from A Main and can be difficult to clear without utility. Attackers should never assume Quad is empty simply because no defender is immediately visible.
NBK
NBK is the corner between Quad and Squeaky.
The position is named after professional player Nathan “NBK-” Schmitt. It is a dangerous off-angle that can punish players who focus too heavily on Quad, Forklift or the center of the site.
Shroud or Boost Boxes
This callout refers to the boxes between A Main and Squeaky.
Some players call the area Shroud, while others simply call it Boost. Teams should agree on one name to avoid confusion.
Default
Default is one of the most common plant locations on A Site.
Because “Default” may describe either the bomb position or a nearby player, communication should be specific.
For example:
Highway
Highway is the elevated route connecting Mid to A Site.
It is the key route in an A split. A Terrorist reaching Highway can pressure site defenders from a second direction and intercept rotations from Mid.
White Box
White Box is the large white structure near the Mid side of Highway.
It is frequently used by CT players contesting Mid or falling back toward A.
Truck
Truck is located outside A Site near the CT rotation area.
It is an important retake and support position. It can also provide visibility toward common plant spots, depending on where the bomb is placed.
CT Hall
CT Hall is part of the internal defensive route connecting the areas behind A and B.
It is one of the CT side’s main rotation paths.
Mid Callouts
Garage
Garage is the large structure between T Spawn and Mid.
It is the main Terrorist route into the center of the map. Players leaving Garage must be ready to fight Connector, White Box, Sandbags, Cubby and other Mid positions.
T Red
T Red is the red container inside Garage.
It provides elevation and creates a different angle toward Mid, but players using it may be vulnerable to utility and pre-aimed shots.
Boost
Boost is the elevated T-side position overlooking Mid.
A teammate can boost another player into a stronger angle. Because “Boost” can also describe other boostable locations, teams should provide additional context when necessary.
Sandbags
Sandbags is the close position near Connector and the Mid roof area.
It can punish players who enter Mid without clearing nearby angles. A molotov or coordinated swing is usually the safest way to deal with it.
Connector
Connector is the CT-side room linking Mid with the internal defensive rotation routes.
It is one of the most influential positions on Cache. A defender in Connector can contest Mid, support rotations and watch attackers moving toward Highway or Vents.
Some players call it Z or Z Connector.
Vents
Vents connects Mid to Checkers.
For the T side, Vents turns Mid control into direct B pressure. For the CT side, it provides a rotation route between Mid and the B-side interior.
Moving through Vents becomes extremely dangerous once the opposing team controls the surrounding areas.
Mid Roof
Mid Roof refers to the elevated structure around the building between Vents and Sandbags.
Teams should specify whether an opponent is above, below or beside the structure.
Cubby
Cubby is the recessed position beneath the T-side Boost area.
It is easy to overlook during chaotic Mid fights and can produce free kills against careless players.
B Site Callouts
B Main
B Main is the primary Terrorist entrance into B Site.
It is a narrow choke point that can be controlled with incendiaries, smokes and HE grenades. Direct B attacks become much stronger when paired with pressure from Checkers.
B Halls
B Halls is the enclosed route connecting the T-side areas to B Main, Sun Room and Dumpster.
Sun Room
Sun Room is the room connected to B Halls.
It is commonly used to throw utility toward B Site, including flashes and molotovs for defensive positions.
Toxic
Toxic is the area around the yellow barrel near Sun Room.
It is a common close-range position that should be cleared when moving through the B-side interior.
Checkers
Checkers connects B Main, Vents and B Site.
It is strategically crucial because it allows players with Mid control to attack B from a second direction. A Terrorist inside Checkers can create a brutal crossfire with teammates entering through B Main.
Back Checkers
Back Checkers refers to the deeper section behind the boxes inside the room.
A defender hiding there may survive the initial clearing attempt and punish attackers as they enter the bombsite.
Headshot
Headshot is the low position near the Heaven and Hell side of B Site.
A crouched player can expose only a small part of the head from certain angles, making the position difficult to clear with raw aim alone. Molotovs and coordinated trades are highly effective against it.
Heaven
Heaven is the elevated CT-side platform overlooking B Site.
It is one of the strongest defensive and retake positions on the map. A player in Heaven can support the site, watch the plant and pressure attackers from above.
Rafters
Rafters is the elevated metal area connected to Heaven.
Some players use Heaven and Rafters interchangeably, while others treat them as separate positions.
Hell
Hell is the lower area beneath or beside Heaven.
It can be difficult to clear during a retake because players in Heaven and Hell may support each other.
New Box
New Box is the tall box structure on the B Main side of the bombsite.
It provides powerful cover for defenders and post-plant players but is frequently checked and cleared with utility.
Back Site or Spray
Back Site is the area behind the boxes at the rear of B.
Depending on the team, it may also be called Spray or Back Boxes.
Default
Default is one of the standard plant locations on B Site.
As with A Site, clearly communicate whether the call refers to the planted bomb or an enemy position.
Pit
Pit is the lower section near the B ramp.
Blue
Blue is the area near the blue wall beneath the Heaven and Rafters side.
Tree
Tree is the raised area around the tree behind the CT-side portion of B.
Essential Cache Smokes in CS2
There are dozens of possible smoke lineups on Cache, but competitive players do not need to memorize everything immediately.
Learning six reliable, high-impact smokes is more useful than memorizing 25 situational throws that cannot be reproduced under pressure.
Because Cache has already received geometry and clipping adjustments, every pixel-perfect lineup should be tested on the live version before using it in Premier, FACEIT or league matches.
Connector Smoke From T Spawn
A Connector smoke limits the defender’s vision into Mid and makes it safer for Terrorists to leave Garage.
Some lineups can be thrown from T Spawn, allowing the attacking team to challenge Mid almost immediately.
Why It Matters
The smoke can:
Block an early Connector sightline
Reduce the impact of a CT AWPer
Support a fast Mid take
Create access toward Highway
Help players move toward Vents
Enable later splits toward either site
The smoke does not automatically give the Terrorists Mid. Players still need to clear Sandbags, White Box, Cubby and close angles.
Highway Smoke
A Highway smoke isolates A Site from Mid and limits CT support from White Box or the upper route.
It is useful during:
Direct A executes
A splits
Late-round site hits
Post-plant setups
Fake pressure toward A
The smoke should usually be paired with utility for Forklift, Quad or NBK. Blocking Highway while ignoring the strongest site positions can still leave the execute dead on arrival.
Truck Smoke
Truck is a major CT rotation and retake position behind A.
Smoking it can reduce defensive vision and give the Terrorists more space to plant. However, the smoke must land correctly. A gap or poorly placed edge may allow a defender to see the bomb or create a one-way angle.
B Heaven Smoke
Heaven is one of the strongest positions overlooking B Site.
A well-placed Heaven smoke removes a powerful defensive angle and makes it easier for attackers to cross into the bombsite.
However, Heaven should not be the only focus. Terrorists must still clear:
Checkers
Headshot
New Box
Back Site
Close B Main positions
Smoking Heaven without controlling Checkers may leave the attacking team trapped in another crossfire.
Checkers Smoke
A Checkers smoke can temporarily isolate defenders from B Site and simplify a direct B Main execute.
The trade-off is important: smoking Checkers also prevents the Terrorists from using the room for their own split.
Before throwing the smoke, decide whether the team wants to:
Utility should support the plan, not replace it.
Connector or Z Smoke From Mid
A deeper smoke around Connector can help Terrorists cross Mid and pressure Highway or Vents.
Once the smoke lands, the attacking team should immediately use the timing window to:
A smoke that lands without follow-up pressure is simply wasted utility.
B-Side CT Smoke
A smoke toward the CT-side entrance of B can delay rotations and make the site easier to hold after the bomb is planted.
It becomes especially powerful when paired with a Heaven smoke. However, using both smokes during the execute may leave the Terrorists with less utility for the retake.
Good teams decide in advance which grenades are required for entry and which should be preserved for the post-plant.
Defensive Garage Smoke
The CT side can use an early Garage smoke to slow down Terrorist Mid control.
This can:
Deny early vision
Force additional T-side utility
Delay a fast Mid split
Create time for defensive rotations
Support an aggressive close setup
Spawn-based Garage smokes can be particularly effective, but each player must recognize the spawn and know the correct lineup.
Essential Cache Molotovs
Molotovs are incredibly powerful on Cache because many common defensive positions offer strong cover but limited escape routes.
A properly timed molotov forces the defender to:
Forklift Molotov
Forklift is one of the first major positions attackers must clear when leaving A Main.
A molotov can force the defender into the open, allowing the entry player or a supporting teammate to secure the kill.
Do not stare at the fire while waiting for the CT to move. One player should watch for the forced swing while the rest of the team continues clearing the site.
Sandbags Molotov
Sandbags is a dangerous close angle during a Mid take.
A molotov from Garage can force the defender to move, take damage or use a smoke. This makes it much easier to establish control around White Box and Connector.
Headshot Molotov
Headshot is one of the most frustrating positions to clear during a B execute.
A molotov from the Sun Room or B Halls area can remove the position before the team commits through B Main.
The entry players should be ready to punish anyone escaping toward Heaven, New Box or the back of the site.
Quad Molotov
Quad must be respected during almost every A execute.
Even without a precise lineup, a carefully bounced molotov can deny the back of the position. Attackers should still be ready for the defender to:
Swing before the fire spreads
Escape toward the center of the site
Extinguish the molotov
Survive in a small safe gap
Never assume the position is clear until it has been visually confirmed.
NBK Molotov
NBK is a compact corner that can easily be missed while attackers focus on Quad or Forklift.
A molotov, HE grenade or coordinated prefire can prevent a hidden defender from destroying the execute.
Checkers Molotov
When attacking B directly through Main, incendiary utility can remove close Checkers positions and reduce the risk of being shot from the side.
This is particularly useful when the team has decided not to take Checkers through Mid.
Best Cache Flashbangs
The best flashes on Cache are not necessarily the most complicated.
A strong flashbang should support a specific action:
An A Main entry
A Squeaky swing
A Mid peek
A B Main exit
A Checkers fight
A CT retake
Throwing random flashes without coordinated timing may blind teammates while giving defenders enough time to turn away.
A Main Pop Flash
An A Main pop flash should detonate above or just beyond the entrance.
This creates a short window for the entry player to challenge Forklift, the center of the site and nearby defensive positions.
The thrower should clearly announce the timing:
“Flashing over A Main. Turn now.”
Squeaky Flash
A flash through or above Squeaky can support a synchronized A execute.
Avoid opening the door too early. The sound may reveal the attack and give CT players time to prepare counter-utility.
Mid Flash From Garage
A flash thrown over Garage helps attackers challenge Connector, White Box and the center of Mid.
It is most effective when multiple players swing together. One player peeking alone may still be immediately traded.
B Main Pop Flash
A B Main flash can blind site defenders while allowing teammates to enter with their backs turned to the detonation.
It becomes even stronger when paired with pressure from Checkers. A defender turning away from the B Main flash may become exposed to the second entry route.
CT Retake Flashes
The CT side should preserve at least one flash for retakes whenever possible.
A well-timed flash over B Site can support players swinging from CT, dropping from Heaven or challenging common post-plant positions.
How to Play Cache on T Side
Start With a Structured Default
A strong Cache default collects information without committing the entire team too early.
A simple setup may include:
Two players contesting Mid
One player controlling A Main
One player pressuring Squeaky
One player holding B Halls or B Main
The exact distribution should change according to spawns, available utility and the opponent’s tendencies.
The goal is not to wait passively. A good default should:
Deny CT aggression
Force defensive utility
Identify weak areas
Maintain control of multiple routes
Preserve late-round options
Make Mid Control a Priority
Mid is the engine of Cache.
Taking it gives the Terrorists access to both bombsites and forces the defense to worry about multiple split routes.
A coordinated Mid take normally includes:
After winning Mid, do not send every player through the same route. Keeping pressure near A Main or B Halls prevents the defense from rotating freely.
Split A Through Highway
A Main is a dangerous choke point filled with defensive crossfires.
An A split through Highway forces CT players to divide their attention between two directions.
A basic split can involve:
One or two players entering from A Main
One player pressuring Squeaky
One or two players moving from Mid through Highway
The timing must be synchronized.
If Highway arrives too early, those players can be isolated. If A Main enters too early, the attack becomes a predictable one-direction execute.
Take Checkers Before a B Split
A B split becomes much stronger when the Terrorists control both B Main and Checkers.
The Mid group should clear Vents and Checkers before the B Main players fully commit.
When both groups arrive at the same time, defenders must fight multiple angles and cannot focus all their utility on the main choke point.
Preserve Post-Plant Utility
Winning the site does not guarantee winning the round.
Before executing, decide which player will preserve:
Burning every grenade during the entry may secure the bombsite but leave the post-plant dangerously weak.
Punish CT Aggression
Cache gives defenders several opportunities to push for information:
A Main
Squeaky
B Main
B Halls
Mid
Vents
Place players far enough back to punish these pushes.
An early kill against an aggressive CT can completely break the defensive setup and force uncomfortable rotations.
How to Play Cache on CT Side
Contest Mid Without Throwing the Round
The CT side cannot ignore Mid, but it does not need to fight to the death every round.
A balanced defense can:
Use early utility to delay Garage
Hold Connector with a rifle or AWP
Support from White Box or Highway
Fall back when the Terrorists invest heavy utility
Retake Mid later with flashes
The objective is to prevent the Terrorists from gaining free access to both Highway and Vents.
Build Crossfires on A
Strong A defenses do not rely on one player winning every duel.
Effective combinations include:
Avoid placing both defenders in predictable molotov positions. One good execute could remove the entire setup before the fight begins.
Keep B Main and Checkers Connected
B defenders must constantly communicate whether Checkers is controlled.
A player holding B Main may be exposed from the side if Checkers has already been lost.
If the defense gives up B Main, everyone should know whether the plan is to:
Play from Heaven
Hold a site crossfire
Delay the plant
Set up a retake
Fight from Checkers
Unclear information is often more dangerous than losing the position itself.
Rotate Through Safe Routes
Once Mid is lost, normal rotation paths become risky.
Before rotating, ask:
Do the Terrorists control Highway?
Could they already be inside Vents?
Is Connector safe?
Could someone be lurking in Mid?
Has the bomb been spotted?
A fast rotation is not always a good rotation. Dying while crossing gives the attackers both a free kill and valuable information.
Save Utility for the Execute
Early utility is important, but using every smoke and incendiary in the opening seconds allows the Terrorists to execute late with almost no resistance.
Try to preserve at least:
One smoke for a choke point
One incendiary for the final entry
One flash for a coordinated swing or retake
Use Aggression as a Surprise
A Main, B Main and Mid pushes can produce valuable information.
However, repeating the same aggression makes the defense predictable.
CT aggression is strongest when it is:
Best Positions on Cache
There is no single “best” position on Cache.
The value of each spot depends on the weapon, available utility, teammate support and the opponent’s approach.
Best CT Positions on A Site
Forklift
Strengths: Strong against A Main and excellent for close-range fights.
Weaknesses: Commonly pre-aimed and vulnerable to molotovs.
Best for: Riflers who are comfortable taking an early duel.
Quad
Strengths: Strong cover from A Main and excellent for crossfires.
Weaknesses: Can be isolated with utility.
Best for: Site anchors with support from another defender.
NBK
Strengths: Unexpected close angle that punishes incomplete clearing.
Weaknesses: Limited escape options and highly vulnerable to fire.
Best for: Occasional surprise setups.
Highway and White Box
Strengths: Allows a defender to support both A and Mid.
Weaknesses: Becomes exposed when the Terrorists take central control.
Best for: Mobile riflers and secondary AWP players.
Truck
Strengths: Excellent for rotations, long-range support and retakes.
Weaknesses: Can be blocked by smoke and isolated from the site.
Best for: AWPers and late-round rotators.
Best CT Positions on B Site
Heaven
Strengths: Wide view over B and strong retake potential.
Weaknesses: Frequently smoked and vulnerable to flashes.
Best for: AWPers and supportive riflers.
Headshot
Strengths: Exposes a very small target to B Main.
Weaknesses: Extremely vulnerable to molotovs and grenades.
Best for: Surprise rounds and supported anchors.
Checkers
Strengths: Controls the connection between Mid and B.
Weaknesses: Can be pinched from Vents and B Main.
Best for: Riflers with strong awareness and escape utility.
New Box
Strengths: Powerful cover for a B Site defender.
Weaknesses: Predictable and commonly cleared with utility.
Best for: Anchors playing with teammate support.
Back Site
Strengths: Can survive the initial entry and delay the plant.
Weaknesses: May become isolated from teammates.
Best for: Players focused on buying time rather than taking the first duel.
Strong T-Side Post-Plant Positions
A Main
Strong when the bomb is planted for A Main.
Watch for flanks and defuse smokes.
Squeaky
Creates a separate angle during the post-plant, but the room can become a trap.
Highway
Powerful when the Terrorists still control Mid. It can watch the site and cut off rotations.
B Main
A standard B post-plant position with direct vision toward the bomb.
Defenders may use smoke and flashes to force the player away.
Checkers
Extremely strong when the bomb is planted for visibility from the room.
It also limits CT access through Vents.
Practical A Site Execute
A simple competitive A execute can follow this sequence:
Establish A Main and Squeaky control.
Smoke Truck or the relevant CT rotation sightline.
Smoke Highway if the team is not splitting through Mid.
Molotov Forklift.
Use utility on Quad or NBK.
Throw a pop flash above the site.
Enter from A Main and Squeaky at the same time.
Plant for the positions the team controls.
Preserve at least one grenade for the retake.
The entry order should be planned.
If every player waits for someone else to move first, the utility fades and the defense recovers.
Practical B Site Execute
A basic B execute can follow this sequence:
Secure B Halls and deny aggressive pushes.
Decide whether Checkers will be taken or smoked.
Smoke Heaven.
Smoke or isolate the CT rotation route.
Molotov Headshot.
Clear New Box, Back Site and close B Main.
Throw a pop flash as the entries leave B Main.
Plant for B Main or Checkers.
Spread into crossfires for the post-plant.
A B execute becomes much more dangerous when a teammate pressures through Checkers.
Without that second route, the CTs can focus almost everything on B Main.
What Changed on Cache in CS2?
The rebuilt Cache keeps the recognizable structure and iconic locations of earlier versions, but the map has continued to evolve since its official release.
Post-release updates have included geometry and clipping adjustments. Other small changes may also affect:
Player movement
Grenade bounces
Visibility
Collision around objects
Pixel gaps
Old boost setups
Legacy smoke lineups
For competitive preparation, prioritize resources created after the official CS2 release of Cache.
Older CS guides can still help with strategy and map understanding, but every lineup should be tested before being used in a serious match.
How to Practice Cache Utility
The fastest way to improve is not to memorize dozens of grenades in one session.
Build a repeatable routine:
Learn one smoke at a time.
Throw it successfully five times in a row.
Practice it from the exact competitive position.
Add the flash or molotov that accompanies it.
Rehearse the full execute with movement.
Test the lineup after major map updates.
Use it in scrims before relying on it in official matches.
Do not memorize only the crosshair placement.
Learn:
Where to stand
Whether movement is required
Which mouse buttons are used
Whether a jump throw is needed
How long the grenade remains in the air
Which angles become safe after it lands
What teammates should do during the timing window
A lineup is only useful when the entire team understands what it creates.
Is Cache T-Sided or CT-Sided in CS2?
It is still too early to make a definitive judgment about the updated competitive version.
Cache entered the Active Duty pool in July 2026, and professional teams are still building their map-specific systems, utility protocols and defensive rotations.
The map gives the CT side several powerful positions and crossfires. At the same time, the Terrorists gain tremendous flexibility once they control Mid.
The final balance will depend on:
How consistently teams can take Mid
The strength of A and B retakes
Spawn-based utility
Future geometry updates
The developing professional meta
How teams adapt their CT rotations
Any side-win percentage should be evaluated alongside the event, date range and sample size.
A small number of early matches is not enough to permanently label Cache as T-sided or CT-sided.
Cache FAQ
When Was Cache Added to CS2?
Valve officially added Cache to Counter-Strike 2 on April 28, 2026.
Is Cache in the Active Duty Map Pool?
Yes. Cache entered the Active Duty Map Pool with Premier Season Five on July 8, 2026.
What Map Did Cache Replace?
Cache replaced Overpass in the Active Duty rotation.
Is Cache Played in Professional CS2 Tournaments?
Yes. Major tournament organizers adopted the updated Active Duty pool, bringing Cache into top-level competitive events.
What Are the Most Important Cache Callouts?
The highest-priority callouts include:
A Main
Squeaky
Forklift
Quad
NBK
Highway
White Box
Garage
Connector
Sandbags
Vents
Checkers
B Main
Headshot
New Box
Heaven
CT
Which Cache Smokes Should Players Learn First?
Start with:
Connector
Highway
Truck
B Heaven
Checkers
B-side CT rotation smoke
Players who frequently contest Mid should also learn spawn-based Garage utility.
Do Old CS Cache Smokes Still Work?
Some may still work, but every lineup should be tested.
The CS2 version has received geometry and clipping changes, which may alter precise grenade behavior.
Who Created Cache?
The original Cache was created by Salvatore “Volcano” Garozzo.
Shawn “FMPONE” Snelling later became closely associated with the map’s development and produced the CS2 remake that appeared on the Steam Workshop before Valve officially added it to the game.
Final Tips for Winning on Cache
Cache may look simple, but every round can explode in seconds.
The map rewards teams that understand timing, Mid control, rotations and coordinated utility.
On the T side:
Deny early CT aggression
Fight for Mid
Attack from multiple directions
Preserve post-plant utility
Synchronize split executes
On the CT side:
Maintain information
Contest Mid intelligently
Build reliable crossfires
Preserve defensive grenades
Avoid dangerous rotations through lost territory
Most importantly, practice with current information.
Old Cache knowledge still matters, but this is the CS2 version. Every smoke, flash, boost and movement setup should be tested on the live build before it becomes part of your competitive playbook.
Cache is back. Learn the timings, master the utility and make Mid your territory.

 Aktualisiert am: 29.07.2026•Von:
 ptk917